Friday, September 13, 2013

Wedding Inspiration: Coral Summer Wedding

Fall is hands down my favorite season. So much so that just last week my mom expressed how surprised she was that I didn't decide to have a Fall wedding. She joked that it was because I didn't want to wait until Fall 2014, but in all honesty I've just always imagined having a Spring wedding. I envisioned my favorite color (yellow) and my favorite flower (white daisy), playing a large role in the theme, and both of those elements are very "Spring-y". Not only that, but there's just something about the fresh Spring air and the flowers in bloom after a long, cold, Michigan winter that just shouts "New Beginning". A fresh start for the weather and a fresh start for a relationship. And that's why I we decided on a Spring wedding. ;)

Now just because a Spring wedding was for us, doesn't mean I haven't drooled over my fair share of other seasonal weddings. So I wanted to create a type of inspiration board with different color palettes and ideas for weddings in all four seasons. Although Fall inspired this post originally, I'm going to start with Summer. After all, we do technically have a little over a week left until Summer is officially over, and also, I don't like doing things out of order. So I bring to you some of my favorite images of weddings occurring between the months of June and September. If I were to have a Summer wedding (and an unlimited budget), I'm guessing my wedding would look a lot like these photos.

Color Palette: Coral, Orange & Yellow with Gold Accents
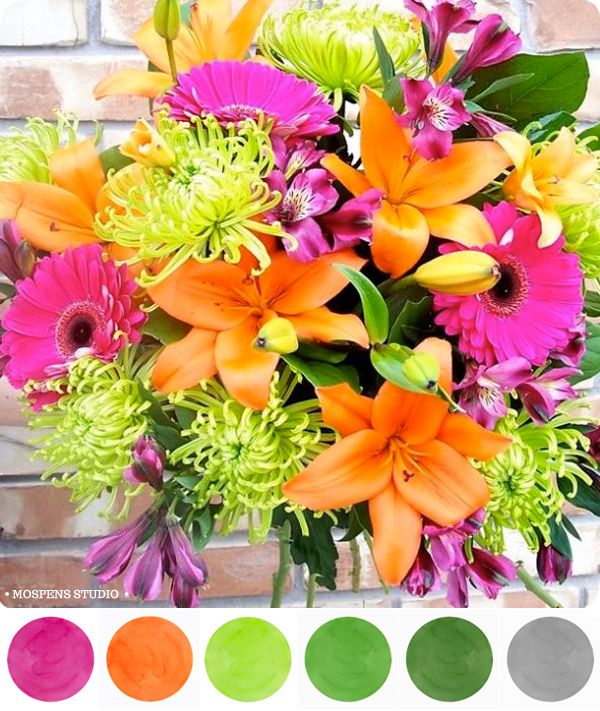

Flowers


Absolutely love the purple and green as complimentary colors, as well


In LOVE with the gold details here..


Desserts

 My kind of dessert! Such a cute idea for a Summer reception.


Venues

Loving the outdoor and tented settings 

String lights are the perfect touch to these outdoor venues


Centerpieces & Table Settings


 Stationary


Decor


Attire

Love these mismatched Bridesmaids dresses

If I had a Summer wedding it would be on a beach; these light and flowy dresses are perfect for a beach wedding


Without a doubt I would be able to plan my own Summer wedding in a snap, as I absolutely love these ideas and color scheme for a summertime soirée. Perhaps these photos will serve as inspiration for your own big day. :)

Thank you so much for reading and have a fabulous weekend!
xoxox Danielle


Monday, September 9, 2013

150 Lunges? Challenge Accepted.

Let me tell you a little bit about my thighs... or what I like to call my trouble area. Even when I got down to my lowest weight this past Spring, my thighs still remained quite thick compared to the rest of my body. My thunder thighs, tree trunks, soccer legs-- they've stored extra body fat, including that of which was supposed to be distributed to my chest, ever since I hit puberty. They're very muscular, too, and no matter how much I work out I feel that I continue to gain muscle in them rather than slim them down. I swear to you I could do lunges everyday and those thighs would still remain the same size-- or would they? I really couldn't tell you because I loathe lunges. I mean loathe. I cannot tell you why, but anytime they're a part of my workout routine I absolutely dread getting into that lunge position. The worst, ugh. 

Anyways, I'm sure many of you have saw the 'Squats Challenge' that has been circulating Facebook and the rest of the internet, and as I'm trying to jazz up my exercise routine, I debated taking it on-- mostly because I'm curious of the results. Then I thought of my trouble area. Why not actually do lunges everyday and see for myself if I'm able to slim those bad boys down?! Maybe I'll even learn to love the lunge? After all, I used to hate running and we all see how that turned out for me, so it's worth a shot! Well, sure enough there is a "Lunges Challenge" out there, and it starts you off with 20 on the first day, and ends with 150 on the last. Ouch. I am pretty excited to see this thing through though, as I'm hoping the results will be quite noticeable. I'd love to walk away from this challenge with slimmer, toned thighs-- so let's see what happens.

ETA:
  •  You can split up your lunges throughout the day (ex. 50 in the morning; 50 at night)
  • 1 lunge = 1 lunge with the right leg AND 1 lunge with the left leg

I will be doing this Lunge Challenge in addition to continuing to eat healthy, cardio 4-5 days a week, and picking back up on yoga. Over the past month I really started slacking when it came to diet and exercise. I never really knew the truth to stress eating until recently, and due to my crazy weekends and schedule overall, I was unable to participate in my planned half marathon (which was supposed to be this past weekend, but I had Kristi's bridal shower to attend). That being said, my training is at a temporary hault, although I'm debating starting up again and just not participating in a race at the end of it, just because I am much more accountable for my workouts when I have a schedule to follow (thus the above challenge). I haven't done yoga in awhile, which is a shame because I was really seeing great results in the toning of my body-- especially in my stomach. So I am making a vow to do yoga at least once a week starting today. Done. And I also completed Day 1 of the Lunge Challenge. 

Today was a very motivated Monday for me; I'm ready to get out of this fitness funk and tone back up! So join me in this challenge if you wish, we can help each other be accountable and say goodbye to our thunder thighs together! Or you can just wait until I'm done to see if 150 lunges are really worth it. ;)
Results to come in 30 days! Thank you for reading and wish me luck on getting through this challenge alive. Alive and with thinner thighs. ;) And good luck to anyone joining me!

xo D

Friday, September 6, 2013

DIY: Burlap Banner

Bride-Day doesn't even begin to cover today. But rather than yours truly being the bride at hand, it's my dear friend Kristi taking the honor. I just pulled the last of 90-ish mini cupcakes out of the oven and am about to finish up the cake pops I started yesterday, but before that, I wanted to finish up this post and get it up before Bride-Day comes to a close (although let's be honest, every day is Bride Day). So anyways, all of this is in preparation for Kristi's bridal shower, which is tomorrow. She's going with a fall theme for her wedding and I volunteered to bake the desserts for the shower, and in doing my trusted Pinterest- research, I stumbled across this adorable burlap banner that would go perfect with her theme.

Thus started my Etsy search for a similar, and affordable banner to order for her-- no such luck. Don't get me wrong, I found plenty of quality contenders, but after shipping and handling I'd be paying at least $30; something that was hard for me to swallow knowing I could make a similar product for a fraction of the price. Now I've never made a burlap banner, but how hard could it be? To be honest, it wasn't a difficult project whatsoever, and its really only time-consuming once you get hung up on every detail-- like I tend to do. But if you're looking to make a burlap banner for less than $10 and spend less than 2 hours making it, then this is the tutorial for you.

Materials Needed

Burlap (length depends on how big you plan on making your banner-- I used about 1/4 of a yard)
Marker (I used a Sharpie paint marker)
Fabric paint
String
Scissors
Hot glue gun or mod podge

Step 1

Cut Your Triangles
Cut the burlap into the shape you want each letter to fit on; in this case I used triangles. I then used this first triangle as a stencil for the rest of the triangles, just so they were all the same size. I literally put the triangle up to the sheet of burlap and cut around it, until I had 10 triangles.

Step 2

Outline Your Letters
Using my sharpie I lightly outlined each letter onto each triangle piece. I used a special font and for some of the trickier letters I held the burlap up to my computer screen and traced from there.


Step 3

Paint!
Using my fabric paint I simply went over the outline I already established with the marker and made the font thicker and bolder with the paint.

Step 4

Glue on the String
I used a hot glue gun and drew a string of glue at the top of each triangle and then pasted the string to the line of glue. I did this one triangle at a time so that my glue didn't dry up.

Step 5

Hang and Admire! 
You're done! Great job. Now hang that bad boy up and admire your fabulous fall banner. ;)

I am trusting it will look much better at the shower than against my poorly decorated apartment.
Happy Bride Day Night to you all! Now off to finish the treats for tomorrow's festivities. Here's to a fabulous Bridal Shower for Kristi tomorrow, as well as an unforgettable Bachelorette Party tomorrow night! Gosh, do I love wedding season. :)

xoxo Danielle

Monday, September 2, 2013

Motivational Monday Challenge: Create a Vision Board!

 
I Spy... a nugget nose.

Previously I wrote about Jim Carrey and how he used visualization to make his dreams a reality. He is not the only successful figure to use this goal-setting technique though. In fact, many notable individuals have promoted the use of a physical representations of goals, such as vision boards and goal-setting journals to achieve success. One of my personal role model's, Bethenny Frankel, is one of these individuals. After listening to her put so much stock into creating a vision board, I decided to make one for myself-- how can you turn down the advice of a businesswoman of that caliber? Seriously. The way I look at it is if I can achieve half the success she has in creating and branding a multimillion dollar product, I will be one happy chick. 


So I bought a poster board and broke out my trusty glue stick and scissors and got to work. I chose photos that represented what I want out of life both personally and professionally, which included several photos of dogs (including Corgis, of course), fancy vehicles, fit bodies, women I look up to, and more. My goals of being a successful, financially comfortable businesswoman are more than apparent upon looking at my board, but so are my dreams of being a fit, animal-saving, season-ticket-holding, big-city-living, world traveler with a Master's degree.


Many of you reading this may be rolling your eyes and thinking these goals are far-fetched and unattainable-- or just plain weird, and that's fine-- just don't come asking to ride in my boat at my private lake house in 10 years. ;) Seriously though, if that's your reaction to my future, I'm going to go ahead and assume that you have the same doubts when it comes to your own and that you're probably not dreaming big enough... so cut it out! Put all of your dreams out there and take the proper steps forward in order to make the visions on your board a reality. I can't make any guarantees, but I'm sure you won't regret it. 


I keep my vision board in a safe place in my room and just broke it out for the first time in months and was greeted by the same goosebumps I got when I first created it back in March. There is something so exciting and hopeful about the unknown that is the future and the fact that we can shape it however we want. This board is representative of everything I want out of life and I cannot wait until the day I look at it smiling, with an immense feeling of accomplishment and pride that I achieved all that I set out to and more. And that's what a vision board is. It keeps us motivated with our eyes on the prize and serves as a sort of physical checklist-- the biggest checklist you may ever create. 


So go ahead, grab the biggest poster board you can find and get to work. Keep adding on to it as time goes on, create several boards, do what you have to to make your board to suit you. And remember to take it out when you're feeling discouraged, when you get fired or quit your job, when you can't lose that last five pounds, when the offer for your dream house falls through, when you keep hitting walls in what you're trying to accomplish and need that extra push. Use it as a reminder that you still have time; that these are just challenges that will make it so worth it in the end when you can look at your vision board and say "I did it!". 


I leave you with some ideas of what images to include in your own vision board:
  • Dream jobs
  • Bucket list items
  • Dream cars and homes
  • Personal goals
  • Where you'd like to live
  • Fitness goals
  • Your ideal lifestyle 
 
These are just some suggestions, remember this board is representative of your own unique aspirations, so go crazy! Put anything you want on there that will light a fire under your tush and get you to achieving your goals. The world is your oyster. Reach for the stars. Take the bulls by it's horns. Life's a garden, dig it! (OK, I'm not sure if the last one really applied but I love Joe Dirt, so I thought I'd throw it in there-- plus it's kind of motivational... right?). Good luck on your vision board; I'd love to see what you come up with or what you already have created, so feel free to share! Thank you for reading and I hope your Monday was very motivational. ;)
XO Danielle

Frank approves of mama's vision board! ;)